
Sunday, July 31, 2011
Garden Update 31 Jul 2011
We had unsettled weather this week. A lot of cloudiness, some rain, cool evenings, but daytime temperatures in the mid-80s. With the occasional rain and my resolution not to over-water my beds, I haven’t done a lot of watering this week, concentrating mainly on watering transplants and the salad box. All the beds are looking good. The peppers, in particular, are greening up and growing. One of the Poblanos has rocketed up about five inches and the Thai chili, while still petite, has set 4-5 fruit (picture below). The rest of the garden update is below the fold.


Wednesday, July 27, 2011
Tomato and Pepper Update 26 Jul 2011
The tomatoes and peppers are looking pretty good. I have been trimming away and disposing of any yellowed or spotted leaves and spraying with copper once a week. I am trying to prevent wilt disease from hitting the toms, which wiped out most of my heirloom tomatoes last year.
So far the heirlooms look healthy. This year I planted a Mr. Stripey since I couldn't find a German Striped or German Pink. It seems to be climbing straight up without a lot of suckers. Not many fruit yet but it is flowering a lot.

So far the heirlooms look healthy. This year I planted a Mr. Stripey since I couldn't find a German Striped or German Pink. It seems to be climbing straight up without a lot of suckers. Not many fruit yet but it is flowering a lot.

Tuesday, July 26, 2011
Building My SFG - Part II, Building the Beds
The next step on my way to Square Foot gardening was to prep the garden plot to ready it for the raised beds. It was a very wet spring and it rained a lot during this preparation work. The soil was saturated and very gummy. I chose not to till the soil. I simply used a hoe, spade and rake to hack away at weeds and to roughly level the plot. Once I had the plot weed free and level, I covered the plot with weed barrier, pinning it down with U-shaped wire staples made for the purpose.


I already had purchased my materials and on rainy days I assembled the 3x6 boxes in the garage. These boxes would fit in my SUV so they were built in the garage and installed in the garden to help anchor down the weed barrier. These boxes needed a little extra consideration, since the material was 5/4 and had channels molded into them. To reinforce the corners and allow material for screws to bite into, I bought composite balusters and cut them into 6 inch pieces. You can see the details below. This method produced sturdy boxes that for a 6 foot length were adequately rigid and did not bow.


I already had purchased my materials and on rainy days I assembled the 3x6 boxes in the garage. These boxes would fit in my SUV so they were built in the garage and installed in the garden to help anchor down the weed barrier. These boxes needed a little extra consideration, since the material was 5/4 and had channels molded into them. To reinforce the corners and allow material for screws to bite into, I bought composite balusters and cut them into 6 inch pieces. You can see the details below. This method produced sturdy boxes that for a 6 foot length were adequately rigid and did not bow.
Harvest 25 Jul 2011
After the lethal weather of last week (108°F on back porch in the shade), the weather has moderated. We had thunderstorms on Saturday which brought in cooler and cloudier weather. It rained a bit on Sunday and again on Monday, which relieves me of the need to water the raised beds. In fact, the cooler weather has allowed me to transplant some seedlings to replace the Romaine lettuce and the pac choi Shuko which have been harvested, and to add some more Swiss chard (I have terrible luck with chard).
My summer squash are still under floating row cover to ward off the squash bugs and vine borers, but they are starting to produce blossoms. I am reluctant to remove the cover because the squash bugs are now at peak around the community garden, but I have to deal with pollination. On Saturday I tried to hand-pollinate the zucchini by using a piece of jute twine as a swab to transfer pollen from a male flower to my first female flower. Time will tell, but I think I may have succeeded given the dark green color of the fruit, compared to the light green color of the baby fruit to the right below the female flower. Today I used a cotton swab from the pack I am now carrying in my garden basket to hand pollinate two more female zucchini blossoms.

My summer squash are still under floating row cover to ward off the squash bugs and vine borers, but they are starting to produce blossoms. I am reluctant to remove the cover because the squash bugs are now at peak around the community garden, but I have to deal with pollination. On Saturday I tried to hand-pollinate the zucchini by using a piece of jute twine as a swab to transfer pollen from a male flower to my first female flower. Time will tell, but I think I may have succeeded given the dark green color of the fruit, compared to the light green color of the baby fruit to the right below the female flower. Today I used a cotton swab from the pack I am now carrying in my garden basket to hand pollinate two more female zucchini blossoms.

Sunday, July 24, 2011
Garden Update 24 July 2011
On Saturday we had a community garden walk about. Gardeners were invited to show up to walk around and talk about our gardens while looking for weeds and garden pests. We had early morning thunderstorms, so with a short delay of game we started the tour at 9:30. Many of the usual suspects were found: flea beetles, slugs, Japanese beetles, squash bugs and their eggs, and striped cucumber beetles. And lots of weeds. I helped one gardener identify the plants in her “spinach“ bed as actually being common plantain.
The storm watered my beds for me, saving me that trouble. The peppers actually looked a little better after my epiphany that I was probably over-watering them. There is some new, bright green top growth on the pepper plants, and fruits on the peppers Lady Bell and Cubanelle are developing nicely. I picked more snow peas and four more cucumbers. The bush beans continue to flower but a check shows the beans Provider have small beans that will be ready to pick in a couple of days. The soybeans are starting to flower (see below), with tiny lavender flowers that appear at leaf junctions.

The cherry tomato Sungold has a couple of fruits starting to ripen, so I will be able to taste them soon, my first tomatoes! The salad garden continues to crank out more salad greens than the family can consume. I finally harvested a couple of the pac choi Shuko, which will go into a stir fry this week. Picture is below, complete with some flea beetle damage. At least no cabbage caterpillar or slug damage.

Saturday, July 23, 2011
Building My SFG - Part I, Planning
The very first step, of course, was to plan the layout of the garden: the size and numbers of the boxes and the width of the paths. I measured the dimensions of the plot, then did the planning at home on graph paper. I used the New Square Foot Gardening scheme devised by Mel Bartholomew in the book of the same name. Mel recommends 4’ wide paths between boxes, which would be nice if I had the space. But with a 15’ by 22’ plot, I had to make some compromises to fit in the number of boxes I wanted.

I took advantage of the particular location of my plot to maximize the amount of space for beds. Since I had wide community garden paths on three sides of my plot, I positioned the boxes 6 inches from the edges of those paths and planned to use the garden paths for access to my raised beds. On the fourth side, where I abut another garden plot, I also positioned the beds 6 inches from the neighboring plot. I figured I could use the paths within my plot to access the beds.
The first row contains two 3x6 boxes. The idea was to use these boxes for plants that take more space than a single square, such as summer squash, broccoli,and Brussels sprouts. These boxes were positioned 6 inches from the borders of the gardens, with two feet between them (rather than Mel’s recommended four). So far, this is workable while not ideal.
Next were two rows of 3 4x4 boxes. I skimped a bit (actually, a lot) on the spacing for these boxes. The plot is only 15’ wide, so paths between the boxes are only 12 inches. I figured I would be able to access squares in the boxes from the sides and only use the paths between boxes to get from row to row. What I didn’t consider is the vertical space taken by hoops for row cover and the trellises. When trying to squeeze between beds, my feet can traverse the foot wide space but my shoulders collide with the trellis supports. So I would recommend at least 2 feet between boxes if you can’t meet Mel’s 4 foot specification.
The last row will eventually contain two 4x6 boxes with 2 feet of spacing between them. These will be built next year and used for tomatoes trained up trellises. This year I just tilled the soil and used row cover to plant my tomatoes. So far they are doing great. Hmmm, should I really build the raised beds?
The next step was to look for suitable material to use for the boxes. The choices I considered were cedar or redwood dimension lumber, composite decking material, and standard framing lumber. Pressure treated lumber was ruled out. I did a tour of my local Lowes and Home Depot stores but found no cedar or redwood. I suspect they carry it or can order it, but I didn’t find anyone to ask. I found Lowes has its own brand of composite decking lumber that is fairly cheap if grey color is OK. I also considered pre-fabricated beds from various sources, but they were too expensive for my budget.
My final decision was to build the 3x6 boxes from composite decking, which comes in 12’ lengths. Three 12’ pieces are required to build the two boxes, for a cost of about $32 per box. Five of the 4x4 boxes were built from fir framing lumber at a cost of about $9 per box. I also purchased one 4x4 Suncast resin plastic raised bed from Lowes for $44 to give it a try.
Tuesday, July 19, 2011
Wilted Lettuce Salad
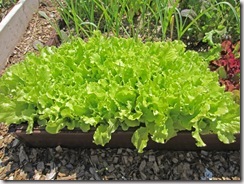
I planted a couple of squares of leaf lettuce Black Seeded Simpson again this year. When I was a child, my family grew large beds of this lettuce, which was used in salads. The leaves are light green and frilly. It adds a nice color and texture variety to salads. This year with the cooler, rainy weather the lettuces have been growing well.
My favorite use for this leaf lettuce is Wilted Lettuce Salad. It sounds strange but it tastes great. Wash the lettuce and place in a bowl. Cook 2-3 slices of bacon in a non-reactive skillet until crisp. Drain the bacon on paper towels and crumble. To the bacon fat in the skillet add 1/4 cup cider vinegar, 1 Tbsp. water, 1 tsp. sugar or Splenda, salt and pepper to taste. Heat the dressing and then drizzle the hot dressing evenly over the lettuce, tossing to coat. Sprinkle the bacon over the salad and serve immediately. Some add sliced green onions and/or chopped hard boiled egg, but my family never did.


My favorite use for this leaf lettuce is Wilted Lettuce Salad. It sounds strange but it tastes great. Wash the lettuce and place in a bowl. Cook 2-3 slices of bacon in a non-reactive skillet until crisp. Drain the bacon on paper towels and crumble. To the bacon fat in the skillet add 1/4 cup cider vinegar, 1 Tbsp. water, 1 tsp. sugar or Splenda, salt and pepper to taste. Heat the dressing and then drizzle the hot dressing evenly over the lettuce, tossing to coat. Sprinkle the bacon over the salad and serve immediately. Some add sliced green onions and/or chopped hard boiled egg, but my family never did.

Subscribe to:
Comments (Atom)